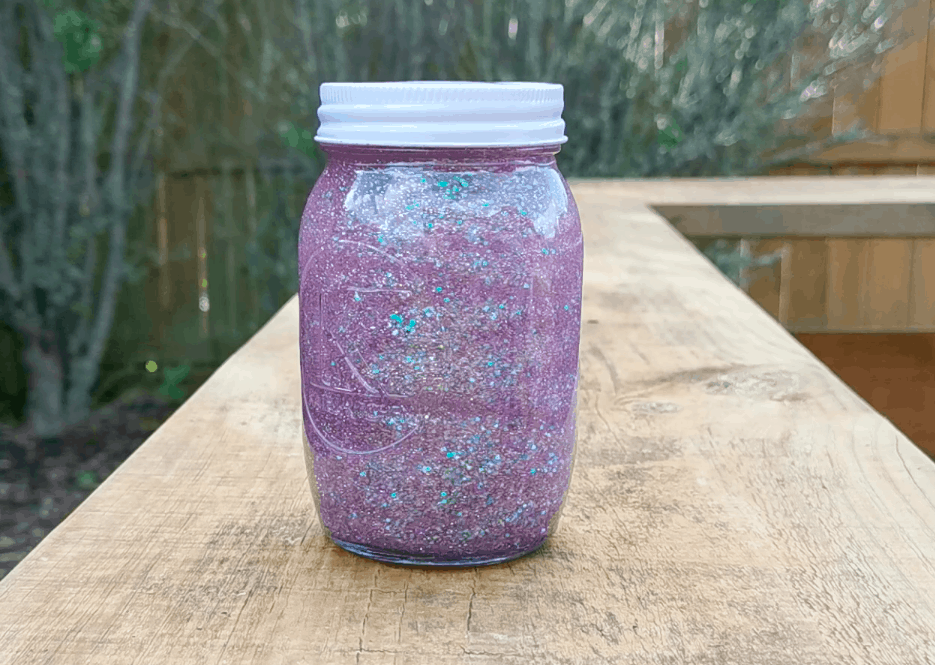
Family Fun & Peace with this Sensory Bottle with Glitter Glue
Today we will create another beautiful calm down jar. This easy sensory bottle with glitter glue will be an instant hit with your kids (and adults!) at home.
I’ve already shared with you all the benefits of sensory jars. If you wish to read a detailed article on what calming jars are and all their benefits I recommend you check my post DIY sensory bottles.
I have two main reasons to produce these beauties:
- they make really fun arts & crafts activities, plus,
- once we’ve finished producing them, we have amazing soothing tools to use when kids get frustrated or anxious.
This recipe is so easy that your little ones will be able to produce them with just a little supervision.
Let’s get ready to swirl with the Silver Soothing Swirl!
Related Reading: 40+ Sensory Play Ideas for Kids (+ Sensory Menu)
How to Make a Sensory Bottle with Glitter Glue
Materials:
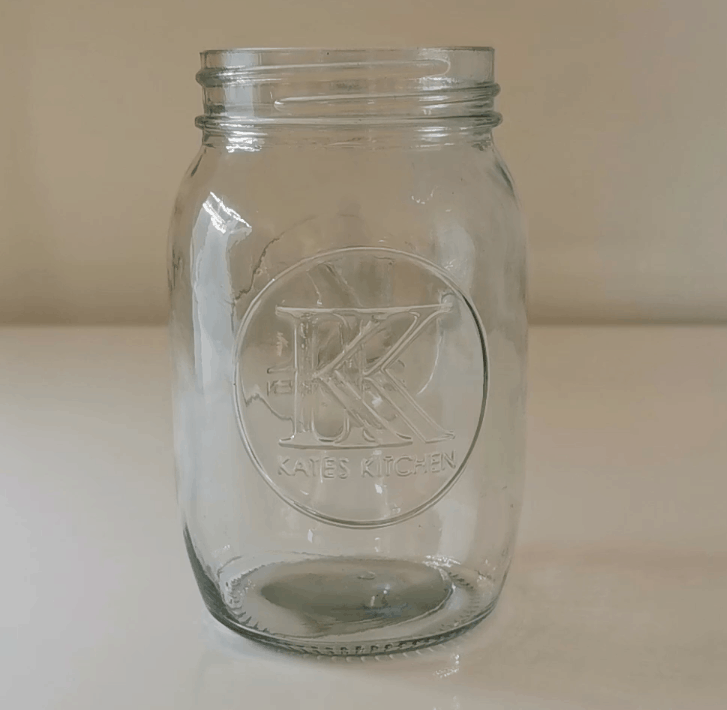
Plastic or Glass Container ( Use a plastic bottle if you are preparing this bottle for a child)
Warm Tap Water
Glitter Glue – color of your choice
Coarse Glitter – assorted colors
Fine Glitter – assorted colors
Glue
Spoon (to mix the ingredients)
Instructions:
– Take a plastic bottle from your recycling bin.
I’ve used a glass jar for the pictures you can see in this tutorial, but I have another one made with plastic for my kids.
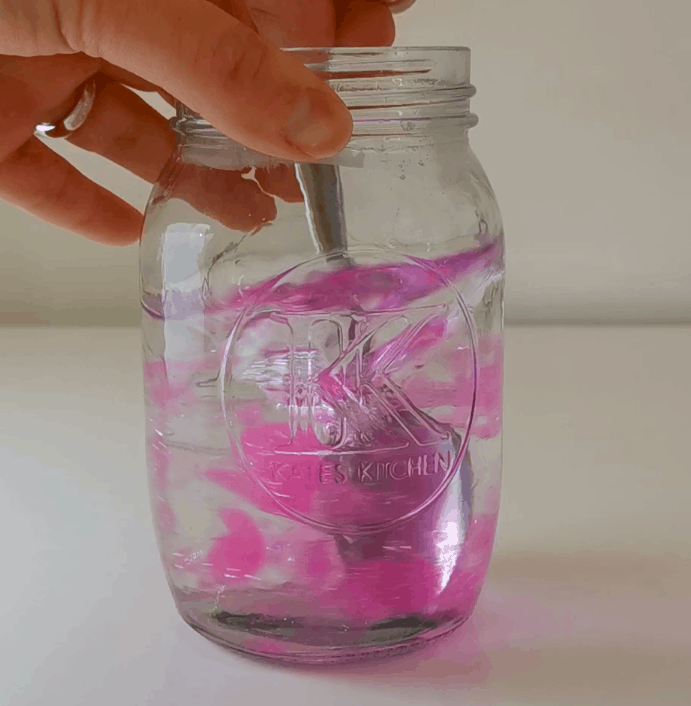
– Fill two-thirds of your container with warm tap water.
I’ve read how-to tutorials that suggest microwaving the water.
I like to prepare very kid-friendly activities and our microwave is way too high for our youngest one to use it. I personally use warm tap water and it works equally well
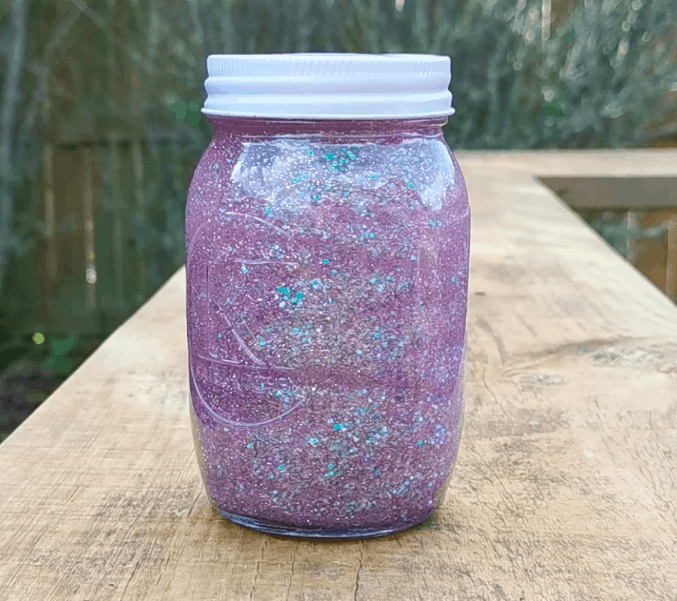
-Add glitter glue (color of your choice)
My daughter loves pink, so for this specific project I’ve used pink glitter glue.
The less you add the faster it will swirl. Check out the picture in the printable card at the end of the post, to see the quantity I added in relation to the jar size.
-Give it a good stir till it blends as much as you can. There may still be a few lumps after a good stir, but that’s ok too.
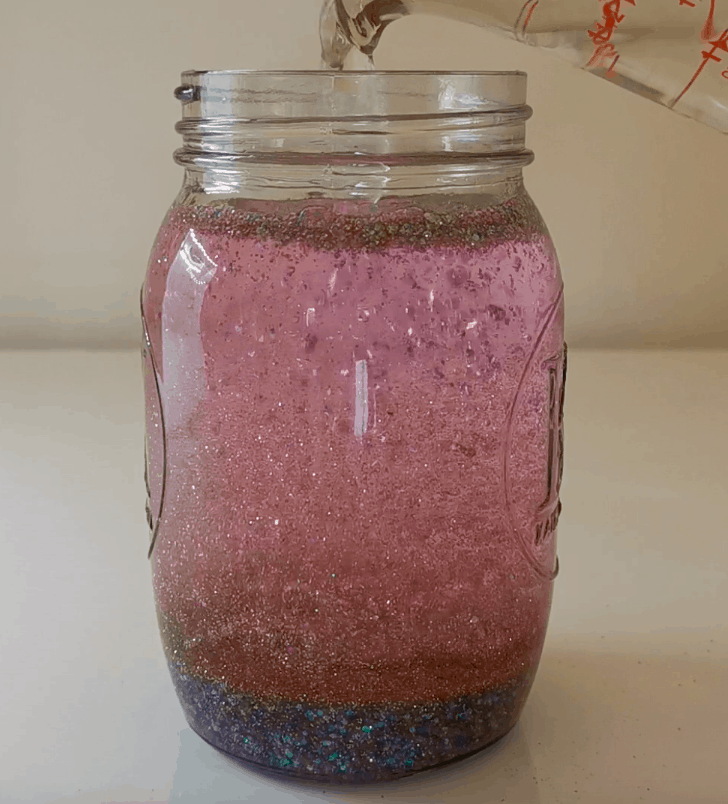
-Add coarse glitter– I added pink, white and blue
-Add fine glitter
I didn’t even know what colors I added. I’ve had to watch a video I took (currently editing the video to add to the post). Unless I forgot to record parts of the process it looks like I added gold, silver, purple, pink and green. Don’t overthink it. Just be impulsive!
– Mix the contents with a spoon. It will help you assess if you like the colors you see in your swirl. Add more glitter if you are still not satisfied.
– Refill the rest of the container with water and mix.
– Glue the lid so that water doesn’t spill when you swirl your sensory bottle
– Shake it! Tip: When you move it in circles it produces this really amazing silver swirl.
See below a printer-friendly recipe card to help you prepare this glitter glue sensory bottle at home ?

Sensory Bottles with Glitter Glue (Soothing Swirl!)
A kid-friendly easy sensory bottle made with glitter glue. Be mesmerized by its soothing swirl!
Materials
- Plastic or Glass Container
- Warm Tap Water
- Glitter Glue - color of your choice
- Coarse Glitter – assorted colors
- Fine Glitter – assorted colors
- Glue
Tools
- Spoon (to mix the ingredients)
Instructions
- Take a plastic bottle from your recycling bin (I used a glass jar for the pictures but I have a plastic bottle for the kids)
- Fill two thirds of your container with warm tap water.

- Add glitter glue (color of your choice). Tip: the less glitter glue the faster the swirl will flow. Check out this picture to see the quantity I added

- Give it a good stir till it blends as much as you can.
- Add coarse glitter

- Add fine glitter- go crazy with the colors! ?

- Mix the contents with a spoon. It will help you assess if you like the colors you see in your swirl.

- Add more glitter if you are still not satisfied and mix again.

- Refill the rest of the container with water and mix.
- Glue the lid so that water doesn’t spill when you swirl your sensory bottle

- Shake it! Tip: When you move it in circles it produces this really amazing silver swirl
Would you like to try more sensory bottle recipes?
You can also check out:
- Sensory jar with hand soap
- Sensory jars with oils (two recipes, one with vegetable oils and another one with baby oil)
Other Sensory Activities for Kids
Would You Like to Read Many More Sensory Activities for Kids of All Ages? Check out the following article! (It also includes a FREE sensory menu):

Sensory Bottles with Glitter Glue: Silver Soothing Swirl


Enjoyed this project.
It was simple and fun to do.
How long did you have to leave the jar to sit while the glue dried?
Ours is still seeping a little super glue after several hours.
Thank you!
JoAnn